Showing posts with label The Graphics Fairy. Show all posts

Thursday, October 16, 2014

Charming Halloween Baskets in 4 Easy Steps


Looking for a simple, inexpensive way to add a bit of Halloween charm to your fall decor?

This summer, I bought up a lot of peat pots of various shapes and sizes at an estate sale. I've made simple peat pot baskets before and have enjoyed incorporating them into vignettes. With my latest acquisition of peat pots, I decided to go with a Halloween theme.

As usual, I forgot to photograph the "in progress." But, I can assure you this project can be completed in 4 easy steps.

Choose the images you want to use and print them on card stock, sized to fit your peat pots. I found my images at The Graphics Fairy.


Paint your peat pot the color of your choice. A light coat of paint works best. Don't worry if the original pot surface peeks through. The charming result is a slightly distressed and rustic appearance. Peat pots are absorbent, so a heavy coat of paint can cause the pot to warp when it dries. 


Adhere your  image to the peat pot with craft glue or Mod Podge. Again, the absorbency of the pot comes into play. It will soak up some of the glue, so cover the back of the image completely with a thick coat. Let the application dry completely before beginning the decorating phase.


Now, embellish, embellish, embellish! I used vintage buttons, paper flowers, glitter, twine, paper doilies, rick rack and vintage lace. Some pots are finished off with rustic, wrapped wire handles and vintage lace from a 1940s wedding dress and filled with Spanish moss. Others are topped with glittery tulle inserts I made from extra wide tulle ribbon.


Make it a great day!
Linking to:

Thursday, May 16, 2013

My Newest Hang Up; National Photo Month, Day 16


Recently, my makeshift jewelry hanger collapsed and all my necklaces ended up in a heap on the floor. What a mess!

I laid the mish-mash of chains on the daybed in what we fondly call our "Patriotic Room" and planned to create a new hanger.


At an artisan boutique the following weekend, I came across this eco-friendly hanger made from a birch branch and equipped with rustic nail heads. Perfection!

Now I needed a unique to display the hanger, so I set out to find something at the local craft store. I found a nice burlap square with a black metal hook. Right piece. Wrong finish. Nothing I couldn't fix, though.

I also bought a couple of inexpensive rusty keys that coordinate well with the rusty nail heads on the wood and the wire hanger. And, I decided to use the artwork I recently created for my peat pot project so the hanger would coordinate with the peat pot.


As much as I like the natural look of burlap, I decided to paint it antique white. I like the way it blends with the birch of the jewelry hanger.


The black hook definitely didn't work. I mixed a couple of different brown paints with gel medium and dabbed on a fairly heavy coat. When it dried, it looked pretty close to the rusty, crusty finish on the keys I had purchased.


Finally, using Mod Podge, I added the scrolled crowned bird image I created using three wonderful images from The Graphics Fairy. You can find the individual images I used here, here and here. I printed my creation on medium-weight card stock, tore it into a shape I liked and lightly applied stamping ink to the surface and edges to create an aged look.


The natural jewelry hanger works well with the rustic burlap hook. And, it's great to get my heap of necklaces off the daybed.


Make it a great day!
Linking to:


Wednesday, May 1, 2013

May Baskets and a Photo a Day


As a young child, May Day and the tradition of delivering and receiving May baskets held such delight for me. I loved the thrill of quietly placing a homemade basket filled with candy and violets from our garden on friends' porches, ringing the doorbell and running for dear life.

To this day, whenever I work with construction paper, pipe cleaners and paper doilies, I'm reminded of May Days past.

Since my children have long since left the nest, the basket tradition is a thing of the past for me. In fact, I'd venture to guess that the tradition has all but disappeared in many American neighborhoods.


Last year, I commemorated May Day by paint washing and embellishing the berry baskets above. Recently, I again got the itch to create a couple of pretties in the spirit of May baskets to fill a couple of gaps in my spring vignettes.

They started as peat pots I picked up at an estate sale. I painted them--one an icy blue, the other a mixture of a couple of earthy colors that resulted in a pale terra cotta that I then dry brushed in a creamy white.


I found a lovely French label graphic at The Graphics Fairy to add to the blue pot. I combined three of Karen's images--a sweet little bird, a beautiful crown and an elegant frame--to create the image in its crowning glory that now graces the terra cotta pot.


To give a slight aged look to the bird basket, I  distressed the image lightly using stamping ink. I Mod Podged the images onto the pots. As a finishing touch, I added wisps of vintage seam tape in complementary colors.


The pots by themselves looked a bit naked so, out of some raw materials I had laying around, I stitched up some little pouches to scrunch up inside the pots. Both pouches are made from wide  ribbon--one sparkly tulle, the other vintage net.  I simply folded the ribbon over on itself and stitched up each side to create the pouch.


No more stealth deliveries to friends on May Day, but that doesn't mean I can't enjoy creating a grown-up version of the May basket.

NATIONAL PHOTO MONTH

May is National Photo Month. Today is Day 1 of my attempt at posting a photo a day.

Today's photo is a version of the French blue peat pot on a wonderful background texture called "Stay," created by Kim Klassen. Kim's creations are exquisite and worth a visit to her site.


Hope you'll come back each day and join the photo fun.


Make it a great day!
Linking to:

Tuesday, April 16, 2013

Pansy Power


Sassy. That's how I describe the pansy. That wonderful velvety face, in colors so deep one could get lost in them, teases of spring and beckons boldly from garden bed and front porch planter before the frost is fully finished.

For centuries, pansy images have adorned postcards and wallpaper, china and linens, fabric and artwork. When I was a child, pansies led the flower parade in my mother's garden every spring. And, since my childhood, pansies have remained a favorite of mine.


This past weekend, I picked up several treasures at a couple of estate sales. One was a large, handmade tool caddy. When I grabbed it, I planned to use it in the garden later this spring--after the threat of frost is long past.  But, I kept wishing I could plant flowers in it now, to bring some much-needed relief from the dreary gray, cold days we've had the past several weeks.

Wait! Why not? This is the perfect weather for the sweet and sassy countenance of the pansy.


The rough and rugged tool caddy makes a substantial planter.


Despite its well-worn exterior, the classic caddy gives a warm welcome to these pretty pansies.

A lovely touch of spring. The only touch of spring in our neck of the woods.


Make it a great day!

Tuesday, June 12, 2012

Tisket, Tasket, Berry Baskets


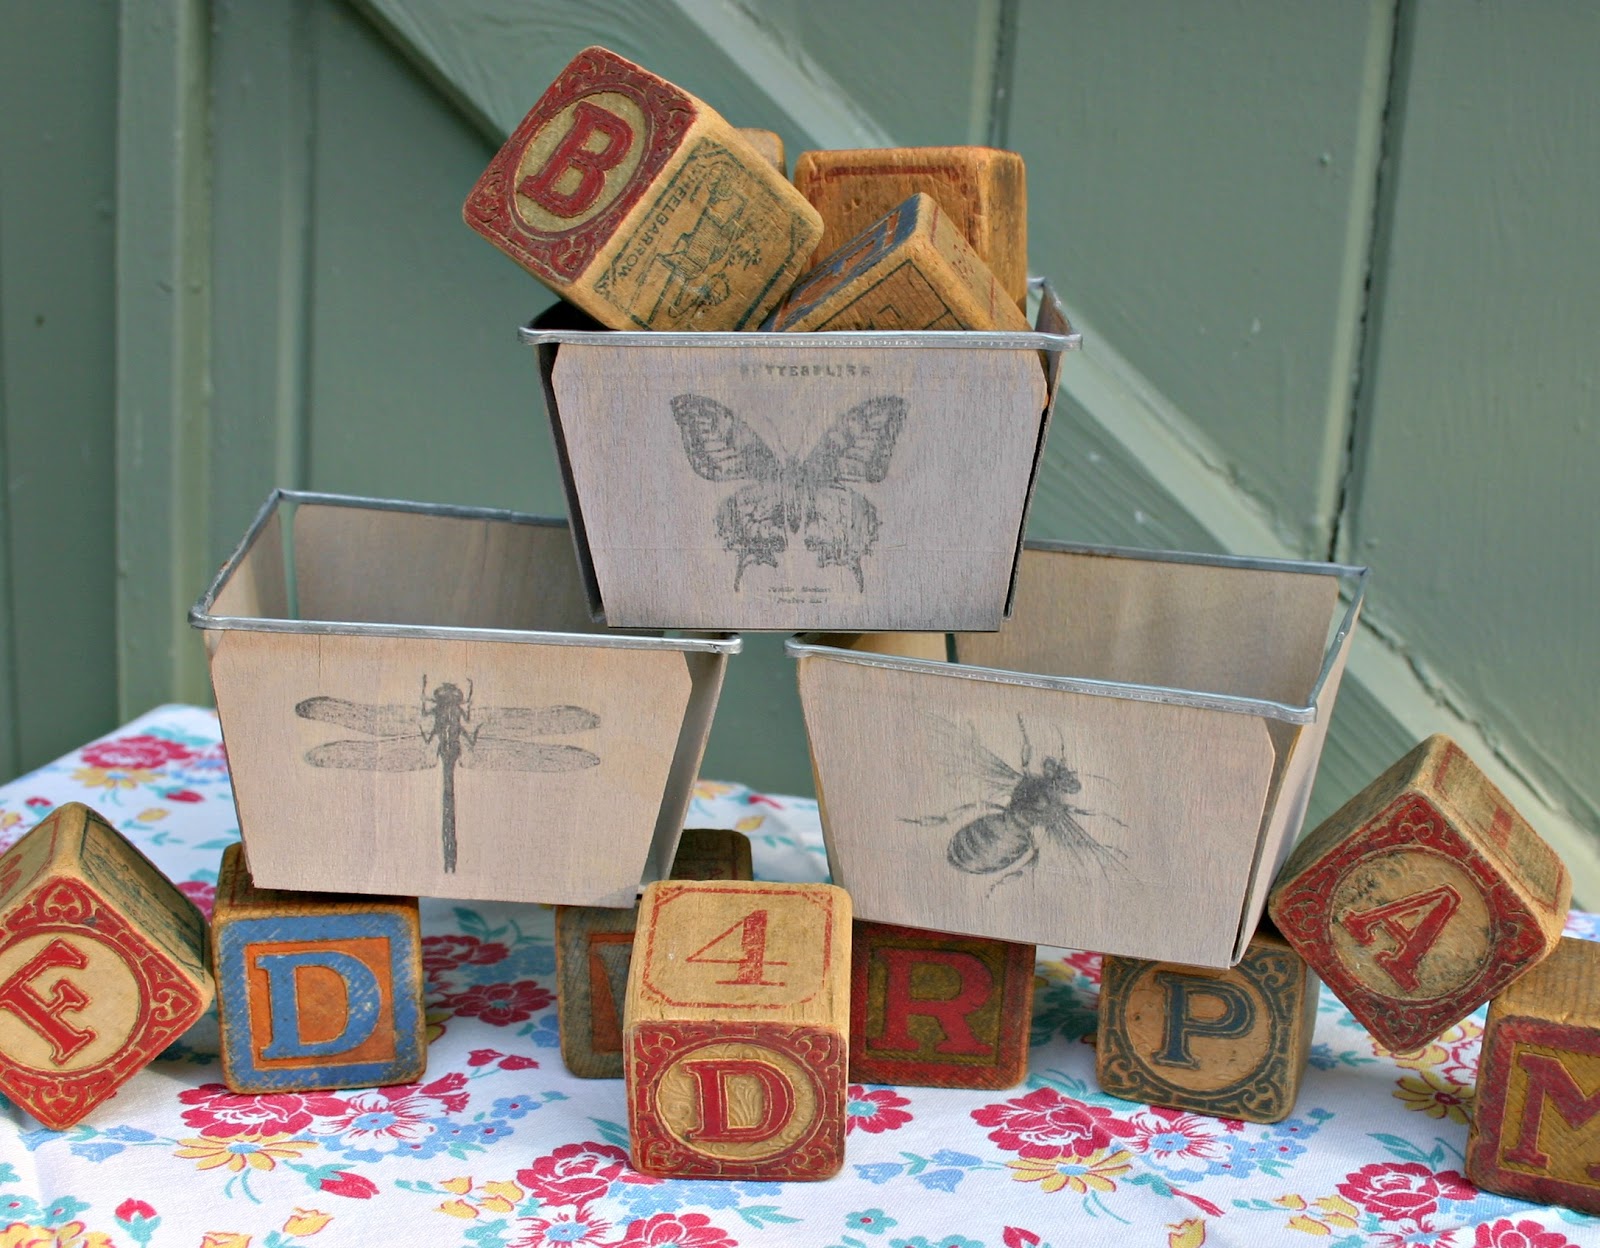
Imagine my delight when I came across three stacks of these vintage berry baskets or boxes that I bought at an estate sale a few years ago. I had put them away in my craft room and lost track of them. They still had the price tag on them. I paid a whopping dollar for 33 baskets!

They have such wonderful character--they've all been used. The metal rims have some rust. The wood has various degrees of staining. Some are warped, cracked and chipped. But, I was able to salvage most of them, using the aged features to create a really sweet bunch of baskets that can be used in all sorts of fun ways.


First, I mixed a grey paint wash using a couple of sample paints I already had. I lightly covered each with the wash. Because of the inconsistent grain of the wood and the random stains they'd acquired over the years, each basket took on a unique look. I love the character the flaws create.


After the boxes dried, I transferred vintage images from The Graphics Fairy onto each one, creating sets of three boxes--each set with its own theme: birds, French and insects.


Berry boxes are versatile enough to use in many different ways. They're great to hold craft supplies or small toys. They look great filled with fresh or dried flowers. They'd also make special hostess gifts.

I'm so berry glad I found these wonderful little baskets.

Make it a great day!

Saturday, March 17, 2012

A Gift Box 40 Years Later


Some time back, I bought an ugly-duckling of a box at a thrift store for 98 cents. It was wooden with a hinged lid that looked like it was intended for something like holding stationery and pens. 


Looks like someone had lovingly hand-painted the lid, signed it on the inside, created a nice velvet lining and given it as a gift back in 1972. I began sanding the paint off the lid before I remembered to take photos, so the Chinese letters that had been painted in super thick gold paint are almost gone at the time of this photo session.

Even though I chose to redo this box with Annie Sloan Chalk Paint, I had to give the lid a pretty deep sanding.  The decorative paint that had been applied back in the '70s, was so thick it had substantial ridges that would have shown through any new paint job.


After I applied a nice coat of ASCP Paris Grey, I used Rosemary's splendid blender pen transfer method to create the wonderful image from The Graphics Fairy. Then I distressed the entire piece. I followed that with a coat of Annie Sloan soft wax and then a light brushing of the dark wax for a more aged look.

In reality, though, it wasn't as simple as all that. When I tried the blender pen transfer the first time, rather than transfer the image, the blender pen simply stripped the paint off the lid. Not to be deterred, however, I painted just the image area with another coat of Paris Grey, let it dry, and added a second coat to that small area. And, believing that the third time was bound to be the charm, I added a third coat for good measure. It worked!


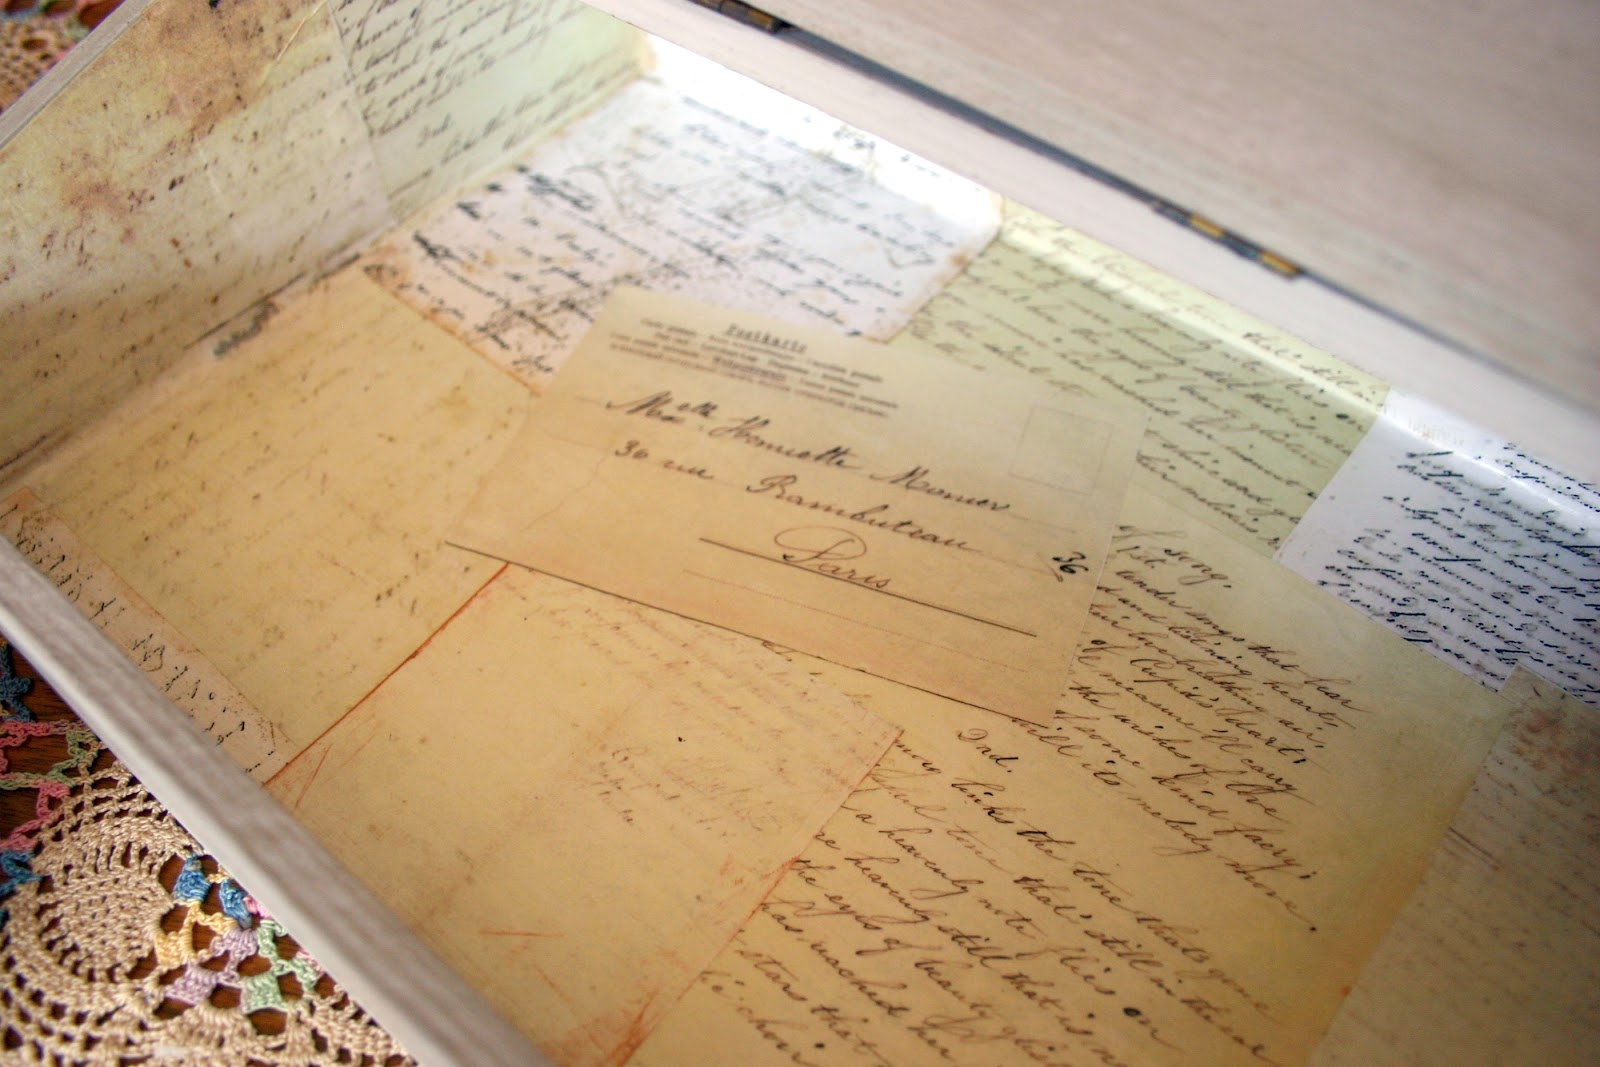
I replaced the red velvet lining with a nice selection of handwritten papers, a couple of which also are from Karen's wonderful collection at The Graphics Fairy. After positioning and repositioning the pieces a few times and finding the arrangement I liked, I attached each with a thin coat of Mod Podge and then gave the entire inside a generous coat of matte finish Mod Podge to seal it.

The hinges were in good shape, but tarnished. Even so, I wanted a more aged look, so added some black acrylic paint with a soft cloth, removed the excess paint and sealed it with a clear spray-on sealer.


As I sit here at my laptop and review the photos of this lovely reclaimed stationery box, I suddenly have an urge to handwrite someone a personal note.

Make it a great day!